Tools / Plate Solve & Annotate
Toolbar tool
Plate Solve & Annotate
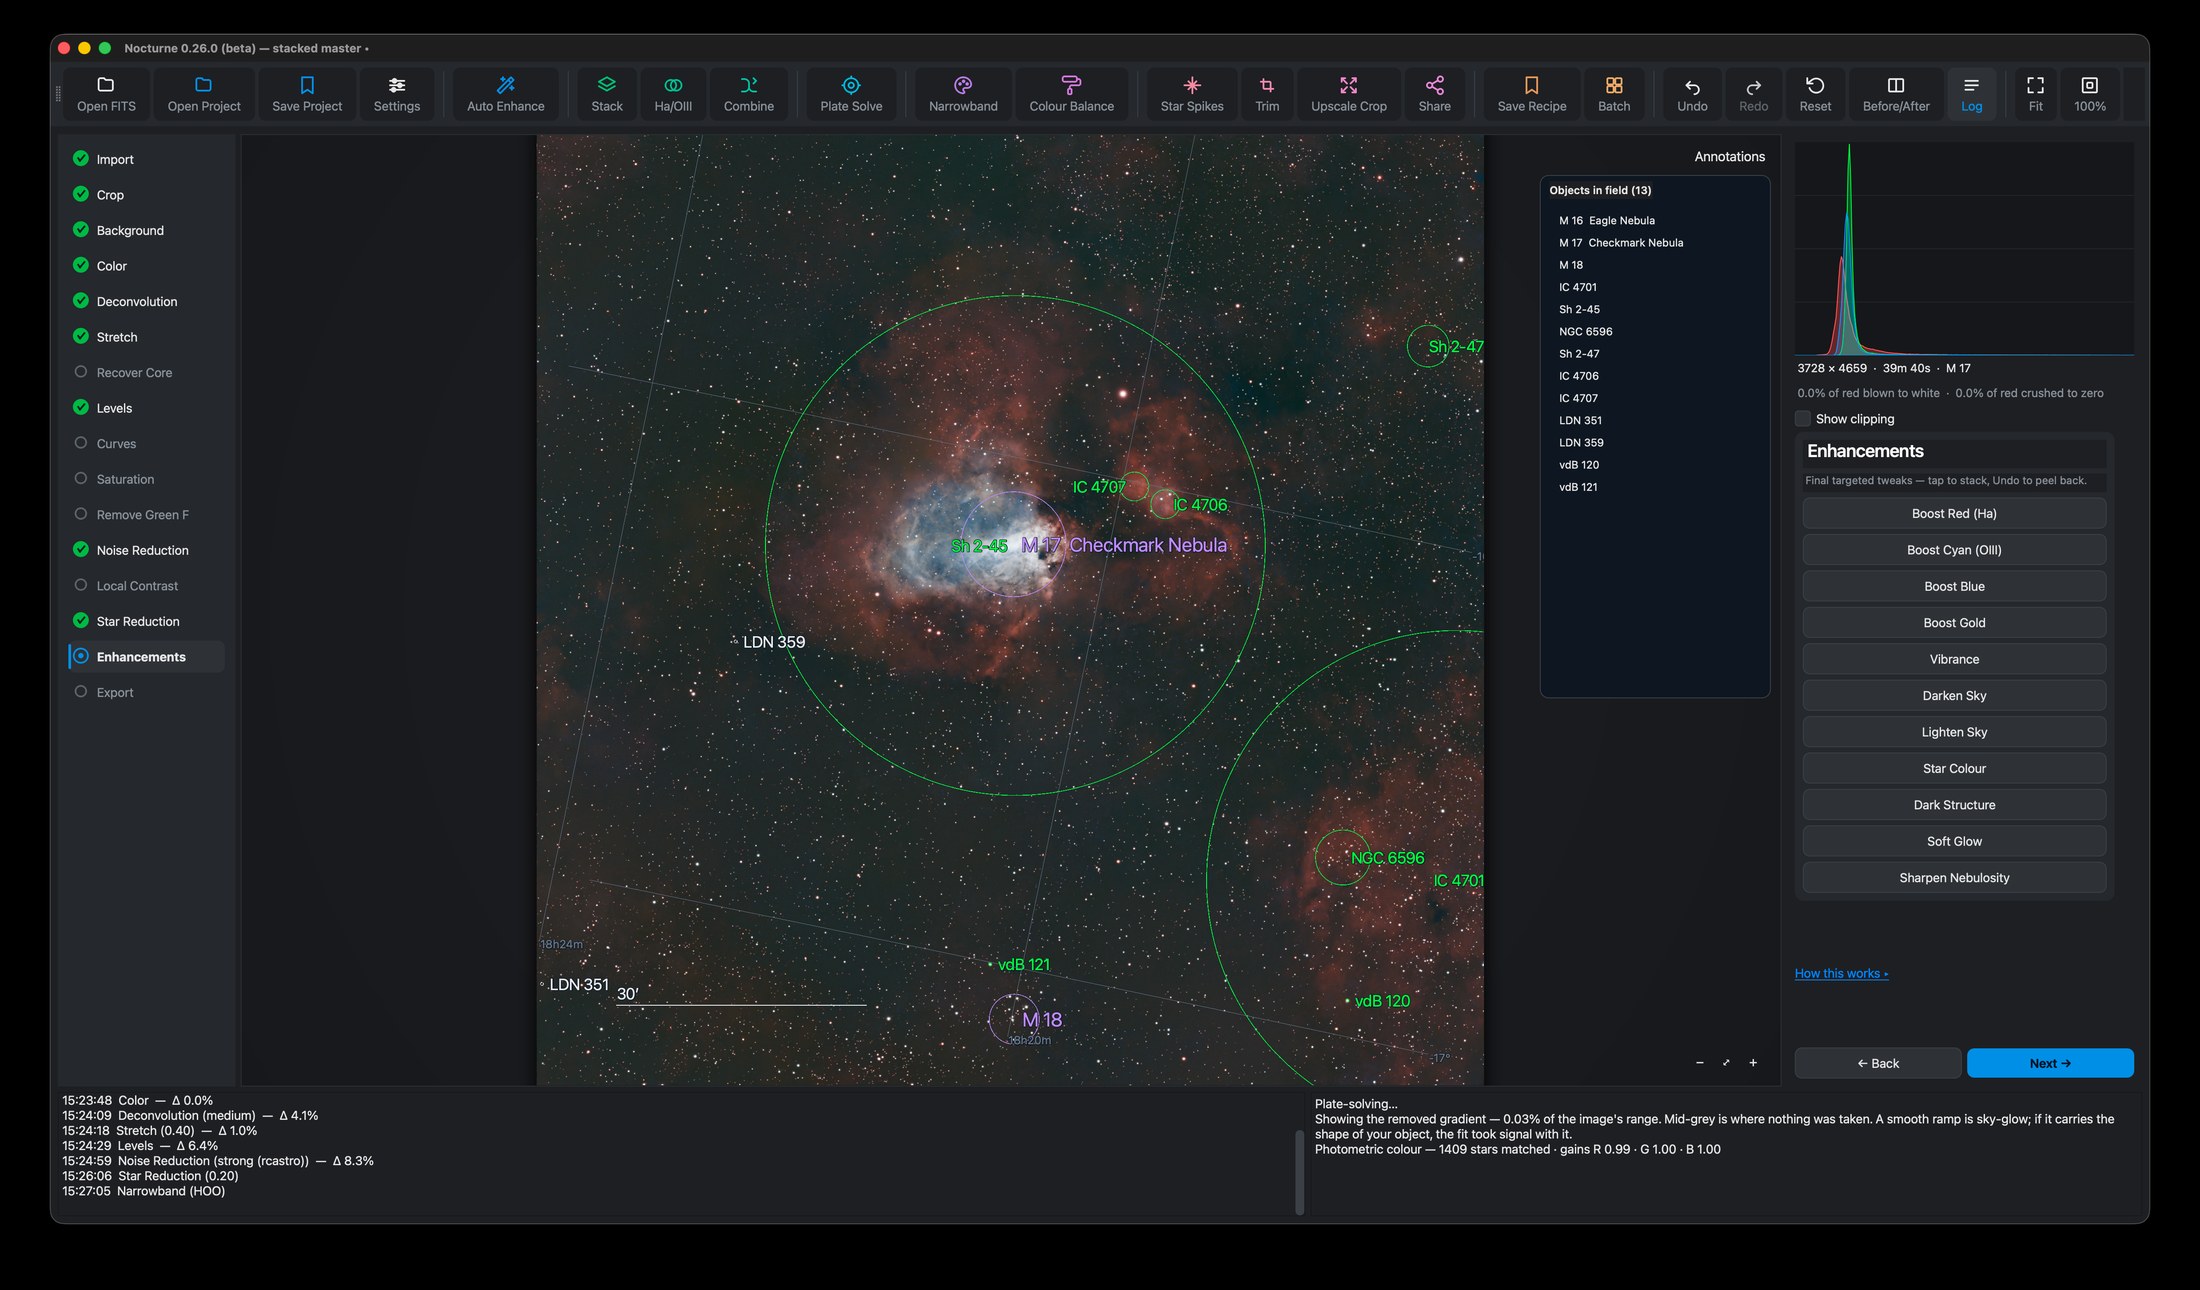
Find out exactly what you photographed — then label it. Objects drawn at their true size on the sky, named stars, an RA/Dec grid, a compass and a scale bar.
What it does
Plate solving works out where a photograph is pointing by matching its star pattern against a catalogue. Nocturne hands your frame to ASTAP, gets back real sky coordinates, and uses them to tell you what you captured — including the things you didn't know were in the frame.
It's the difference between "a nice nebula" and NGC 7000, with the Pelican in the corner and two dark nebulae running through the middle.
What you get
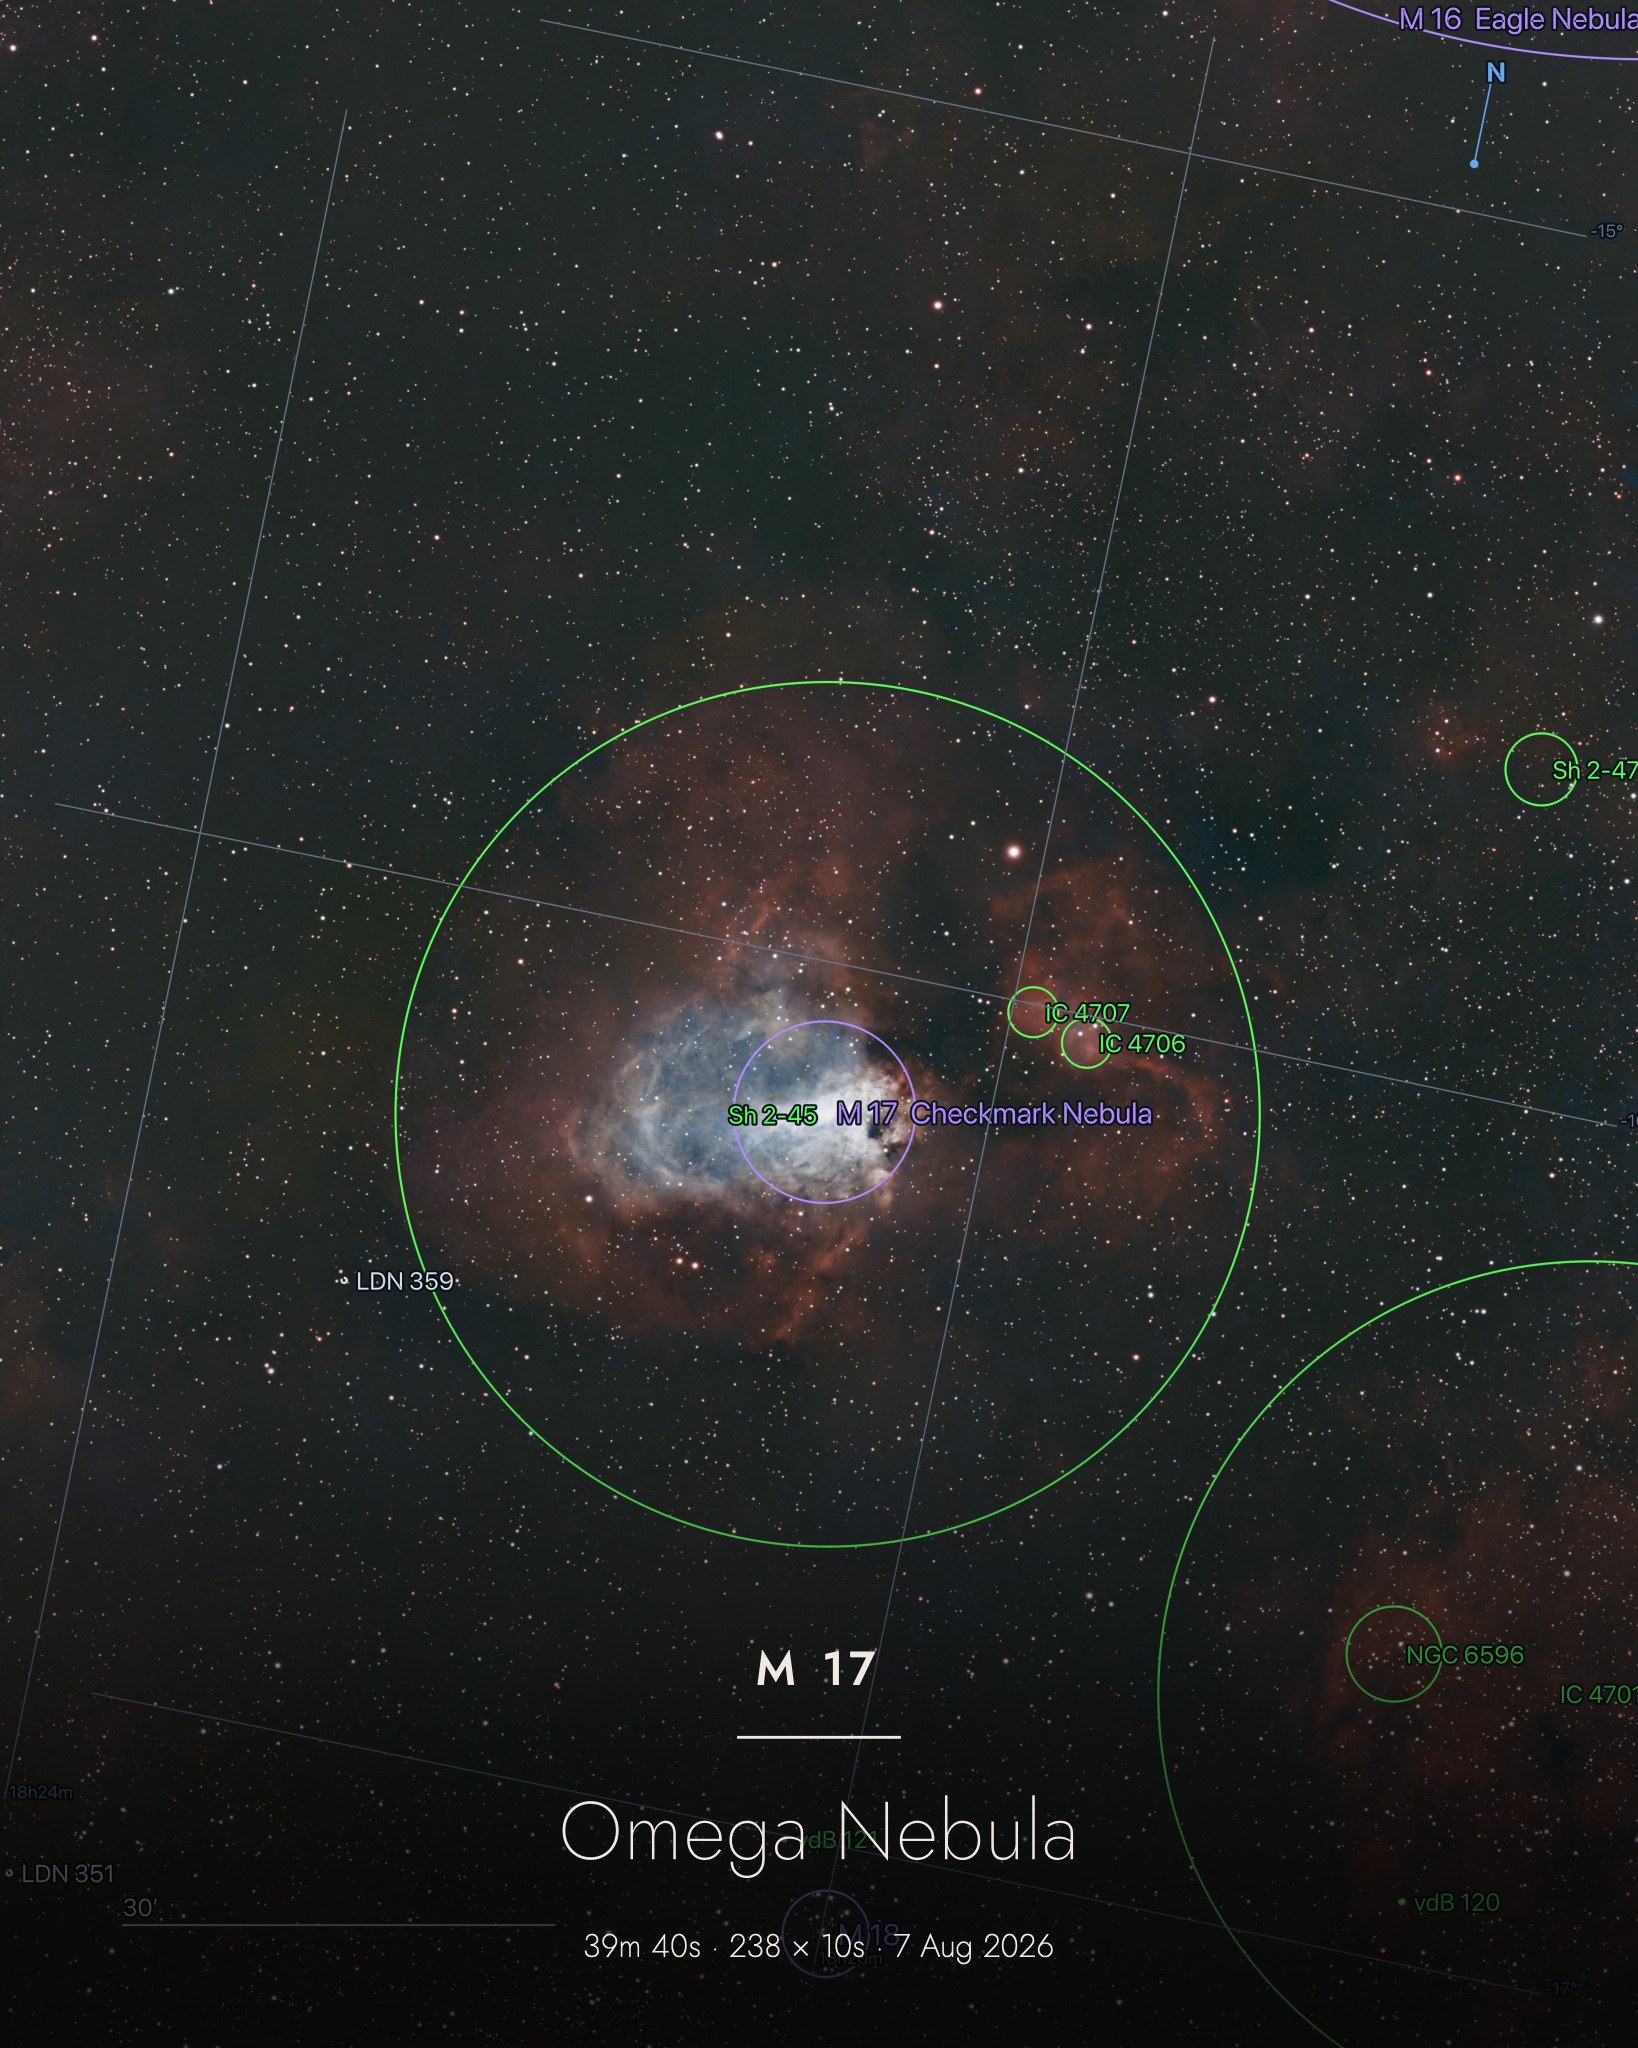
- Objects at their real size. Each object gets a thin ring at its true extent on the sky, with its label set against the ring. A large nebula's ring shows how far it reaches, and runs past the frame edge when the object is bigger than your field. A dashed ring means the catalogue records no size.
- Two kinds of label. Messier, NGC and IC objects, and anything with a common name, get larger labels in soft salmon, with the name people use on a smaller line underneath: IC 1805 over Heart Nebula. The survey catalogues get smaller white labels. These are Lynds (LDN) and Barnard dark nebulae, and Sharpless (Sh 2) and van den Bergh (vdB) bright nebulae.
- One label per object. When two catalogues list the same object, a single label names both: M 16 · IC 4703, with Eagle Nebula underneath.
- Named stars in yellow, each marked by a crosshair with a gap in the middle so the star itself stays visible. There are 2,831 of them, with Bayer and Flamsteed designations.
- A deep-sky catalogue of 16,168 objects: NGC and IC, plus Sharpless HII regions, Lynds and Barnard dark nebulae, van den Bergh reflection nebulae and Lynds bright nebulae (LBN). That's why the dark lane through the North America Nebula comes back labelled LDN 935.
- An RA/Dec grid drawn as true curved lines. Each line carries its own label, just inside the edge of the picture: 2h40m for right ascension, +61° for declination.
- A compass and a scale bar, so you can see orientation and angular size at a glance.
Density decides how many labels the picture carries. A label with no room is left off rather than crowded in, and the Objects in field list beside the image still has it. Lynds bright nebulae appear only when Density is set to All. Each is a small white label beside a small circle that means “about here”, with no true-size ring. Their positions date from 1965 and are approximate.
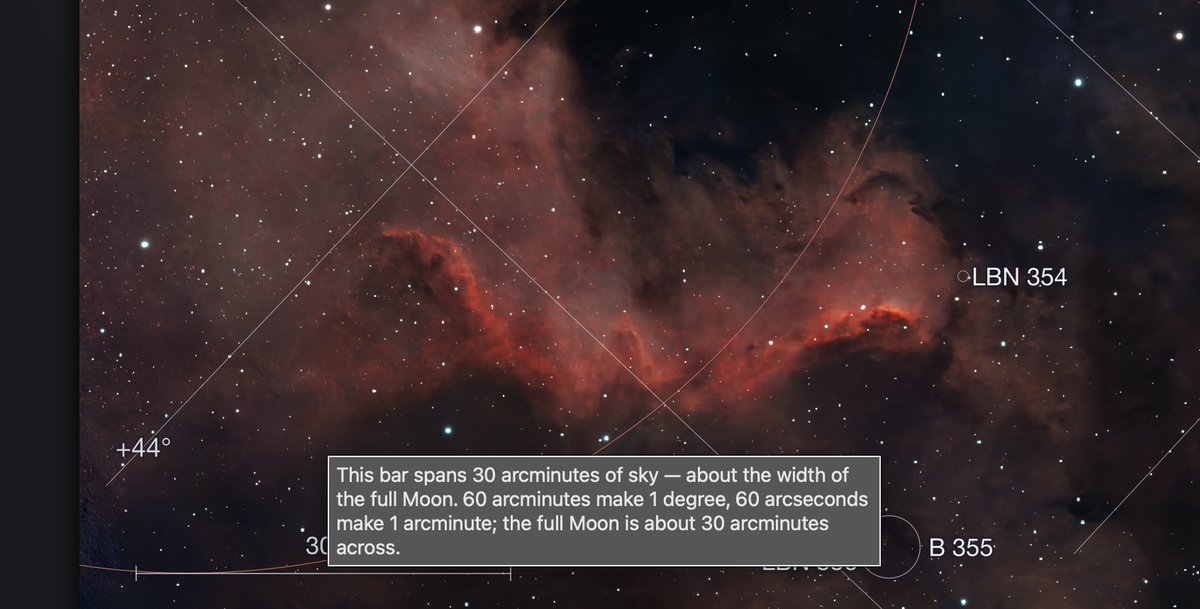
Not sure what a number on the overlay means? Rest the pointer on the scale bar, a grid label or the compass’s N: each explains itself in plain words, and the scale bar compares its length with the full Moon. The tips appear only on screen and never in an export.
How to use it
- Install ASTAP and its star database, then set the path in Settings. (The database is a separate download from ASTAP itself — plate solving needs both.)
- Click Plate Solve in the toolbar, then press Solve. It takes a few seconds.
- Tick the layers you want and pick a Density — how crowded the labels are allowed to get.
- Click any row in the object list to jump the view straight to it.
- Use the Annotations button on the image to show or hide the overlay while you keep working.
Where the labels end up
Annotations aren't just a preview. Tick Burn annotations when you export a PNG and they're rendered into the file at full resolution — laid out again for the export size, not scaled up from the screen. Share can carry them too, so a labelled image still gets the social reframe and caption band. Exported FITS files carry the solution as a proper WCS header.
It also makes your colours honest
A solve is what makes photometric colour calibration possible: knowing where the frame points lets Nocturne look up real Gaia catalogue stars in it and correct the colour against them, instead of guessing from the image itself. On a typical frame that's around 1,500 matched stars.
Plate solving is tuned for Seestar telescopes: the S30 Pro, S50 Pro and S50. Pictures from other telescopes solve too, but if a file doesn’t record its optics, Nocturne assumes an S30 Pro, and the solve may be slower or fail unless you give ASTAP a scale hint.
LimitsTips
Solve early, while the stars are still crisp. The solution stays valid through every tonal step — stretching, denoising and star reduction don't move stars, they only change pixel values — so you solve once and keep the labels up for the rest of the edit.
Cropping, rotating or flipping does change the framing, so the solution no longer lines up and its annotations are hidden. Nocturne tells you when that happens; just re-solve.
If a solve fails, check the star database first — it is the most common cause. Solving after Stretch can also help on a faint frame.
Many stacked masters don’t record their optics. Nocturne then uses the Seestar’s known image scale rather than solving blind, and tells you it did.
Download Nocturnefree · macOS, Linux & Windows Try it on sample data
New to Nocturne? The guide walks through every step in order.