Tools / Presets
Workflow
Start the next picture from your last edit
A preset keeps the steps of one finished edit under a name. The next picture of the same kind of object starts from those steps instead of from nothing, and every one of them stays yours to change.
What it does
A preset is your own edit, saved by name, for pictures of the same kind of object. If you process M 8 and M 17 in much the same way, save the M 8 edit once and start M 17 from it.
The preset holds every step you applied after the crop. That covers the processing steps from Background to Star Reduction, toolbar tools such as Narrowband, Colour Balance, Star Spikes and Starless Levels, and each Enhancements button you clicked. It does not hold the crop, rotate or flip, because every picture has its own framing. Trim, Share and Upscale Crop stay out too, since they finish one particular picture.
A preset is a starting point, not a finished look. Each step it runs lands in your history as an ordinary step that you can change or undo.
Saving a preset
- Process a picture through to Enhancements.
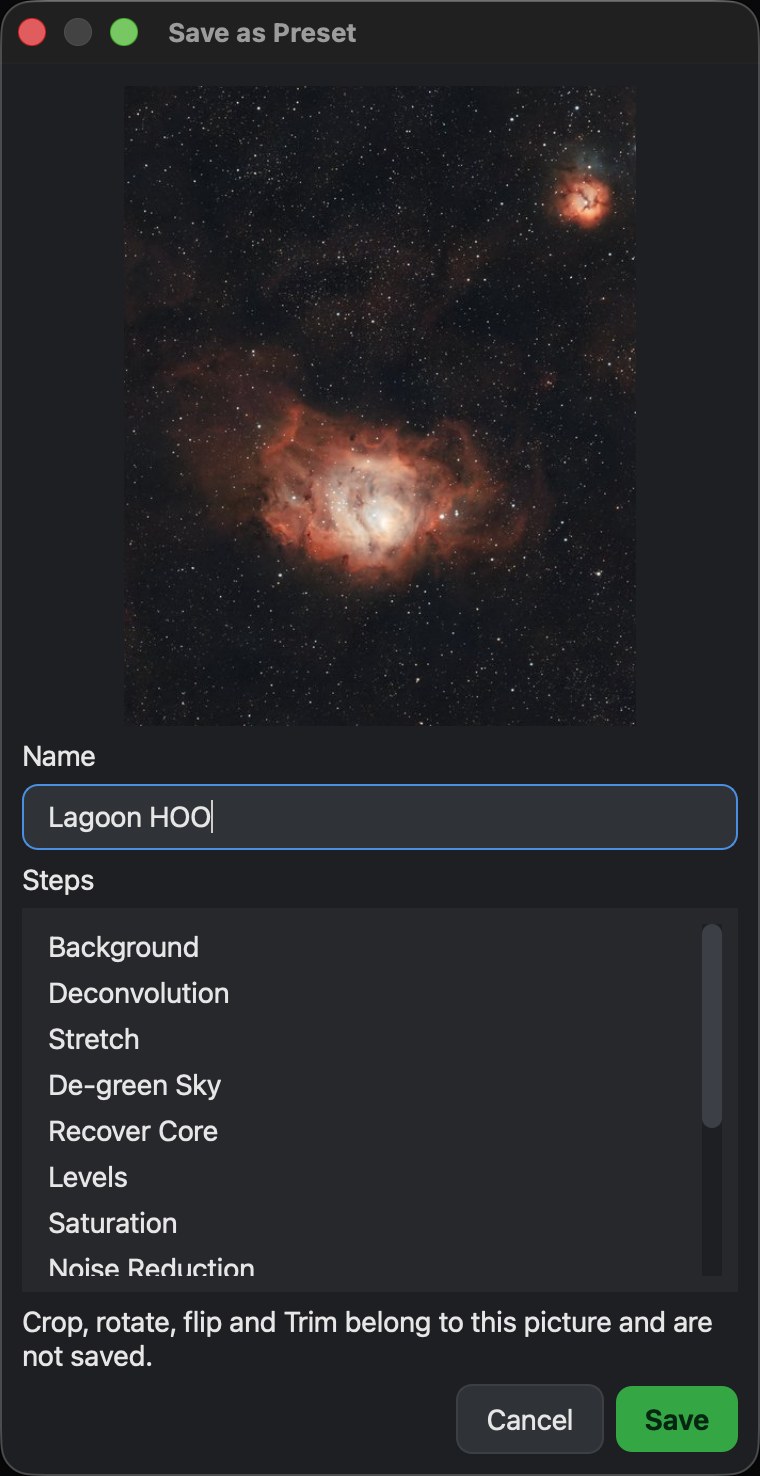
- Click Save as Preset…. It is on the Export step, under Optional — doesn’t save your picture, and in the Project menu. It stays greyed out before Enhancements, on a picture that isn’t stretched yet, and when there are no steps to keep: a preset is made at the end of an edit.
- Give it a name. It starts as the target’s name; a short name fits best on the Crop step’s Apply button.
- Check the list of steps, then click Save.
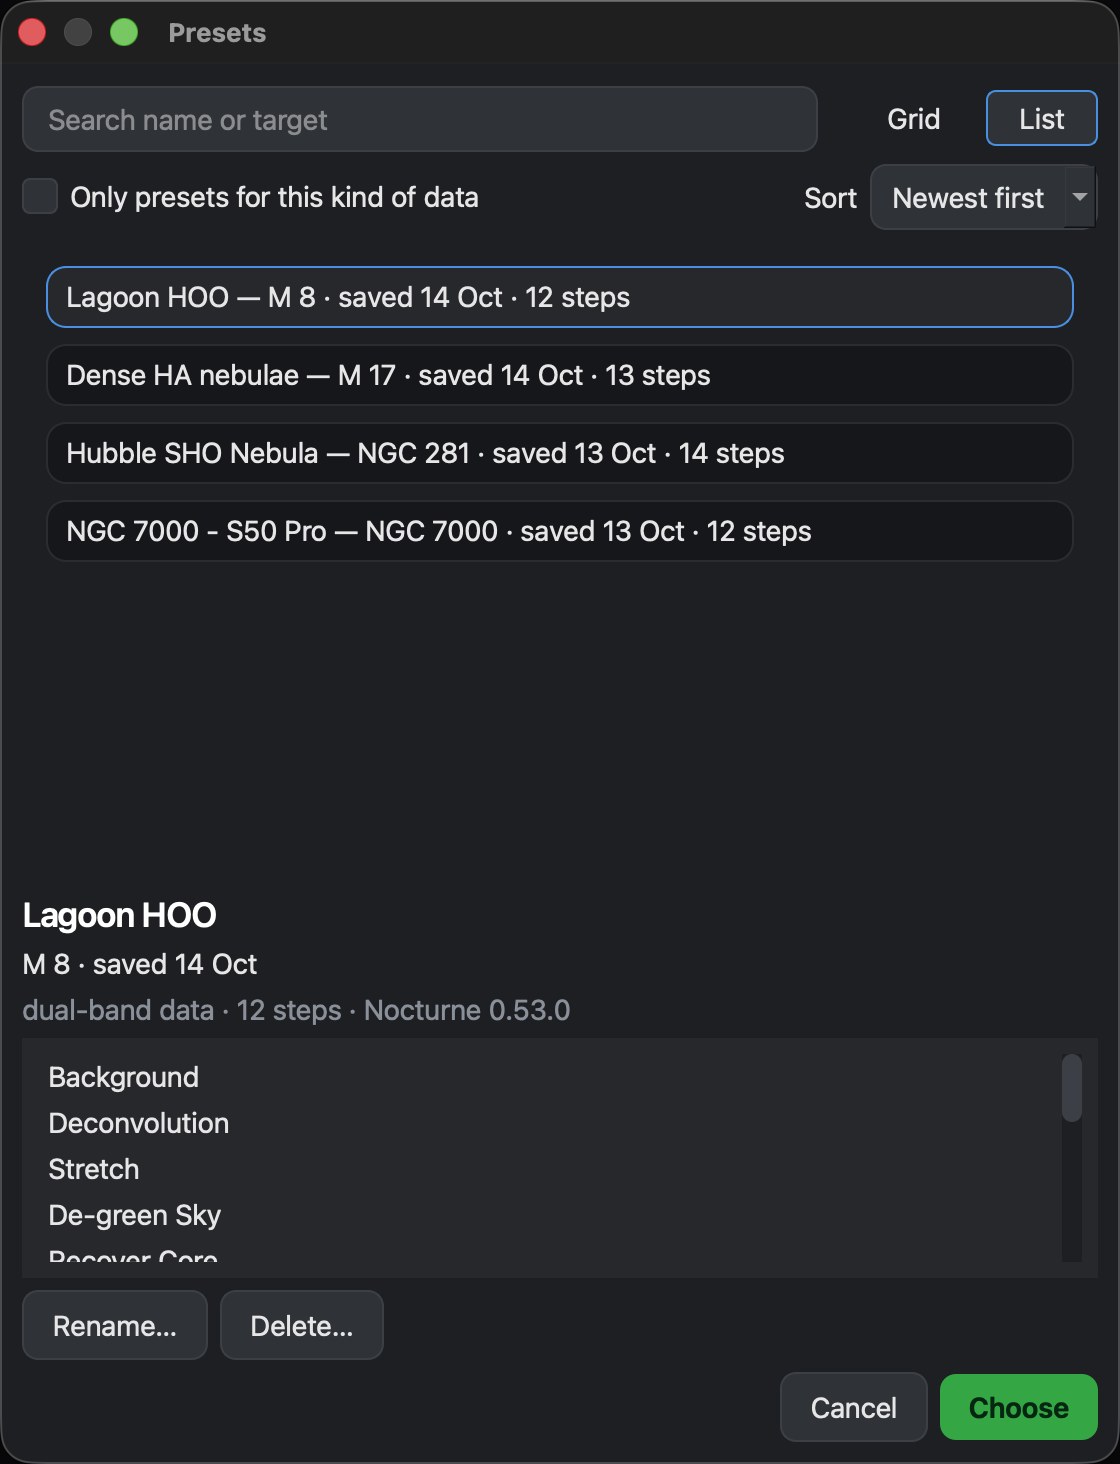
The picture in the dialog is how this edit looked, and the Presets window labels it like M 8 · saved 14 Oct. It is never a preview of your next picture. A step the preset cannot keep is listed as Not included.
Using a preset
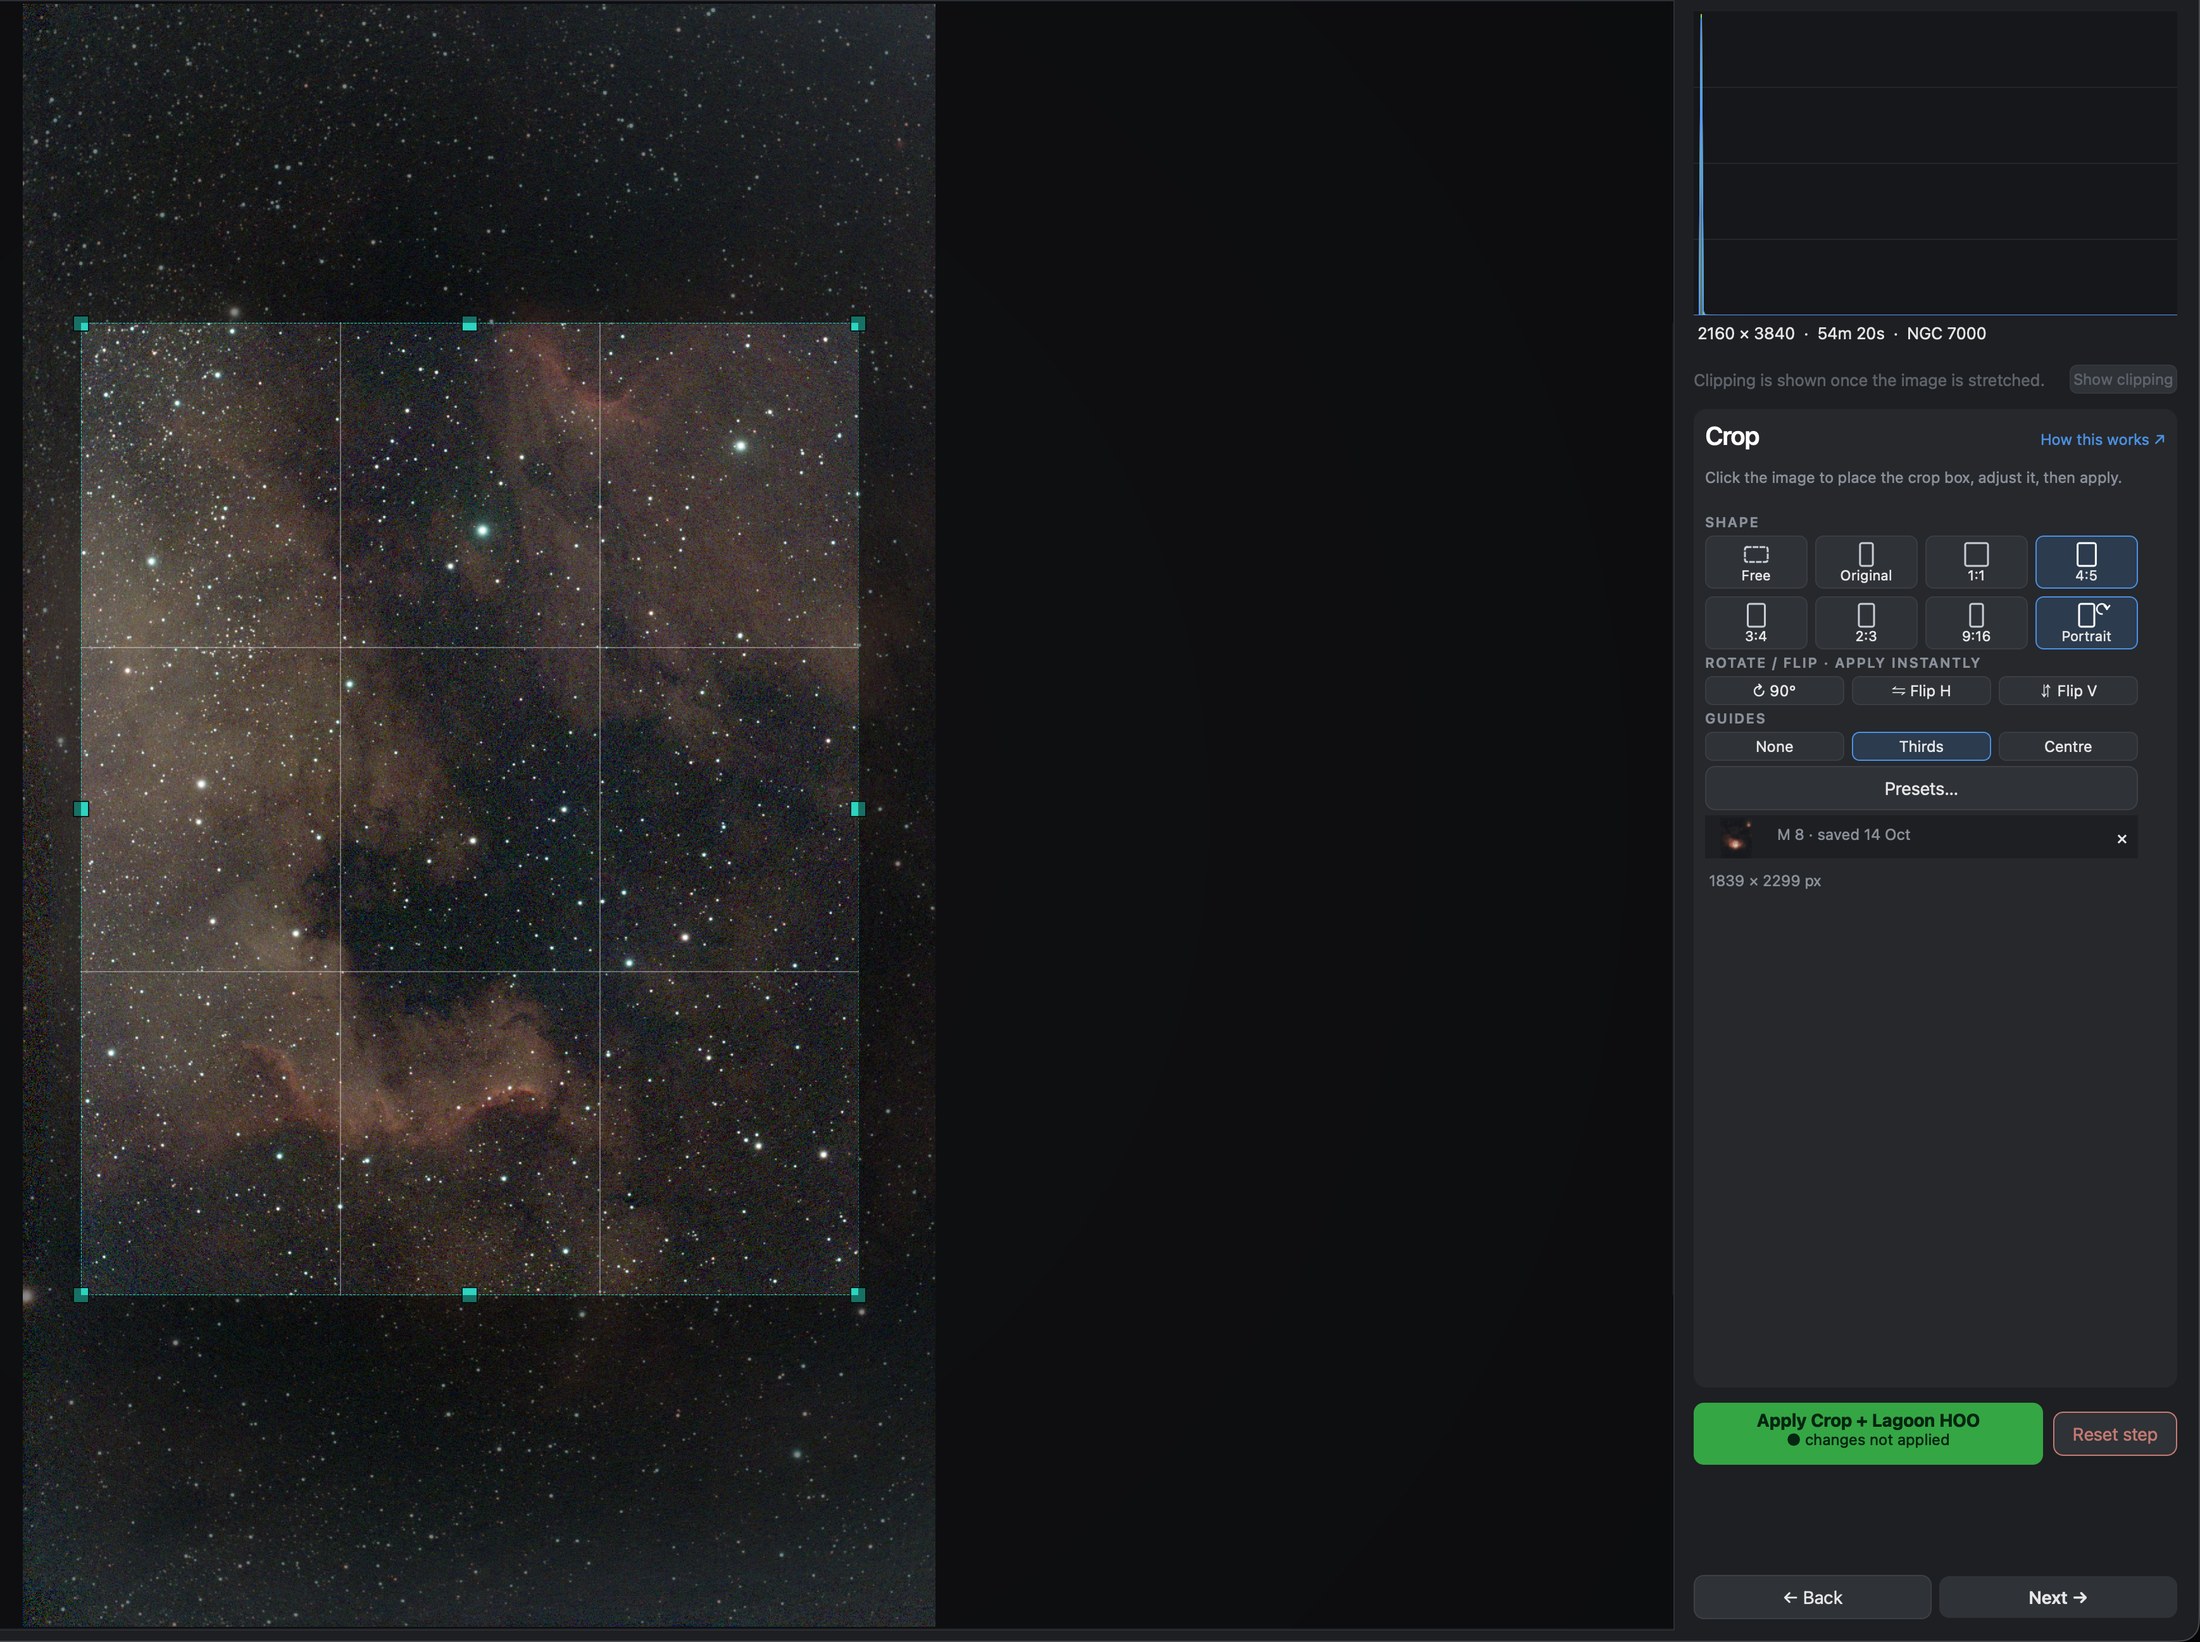
- Open the next picture and go to the Crop step. Place the crop box as usual.
- Click Presets…, the button under Guides. Select a preset to see its steps, then click Choose. Nothing runs yet.
- The chosen preset now shows under Presets…, with its picture, and the Apply button names it: Apply Crop + Lagoon HOO, or Apply Lagoon HOO when no crop box is waiting to be applied. The × beside the preset takes it away again, and so does Use no preset in the Presets window.
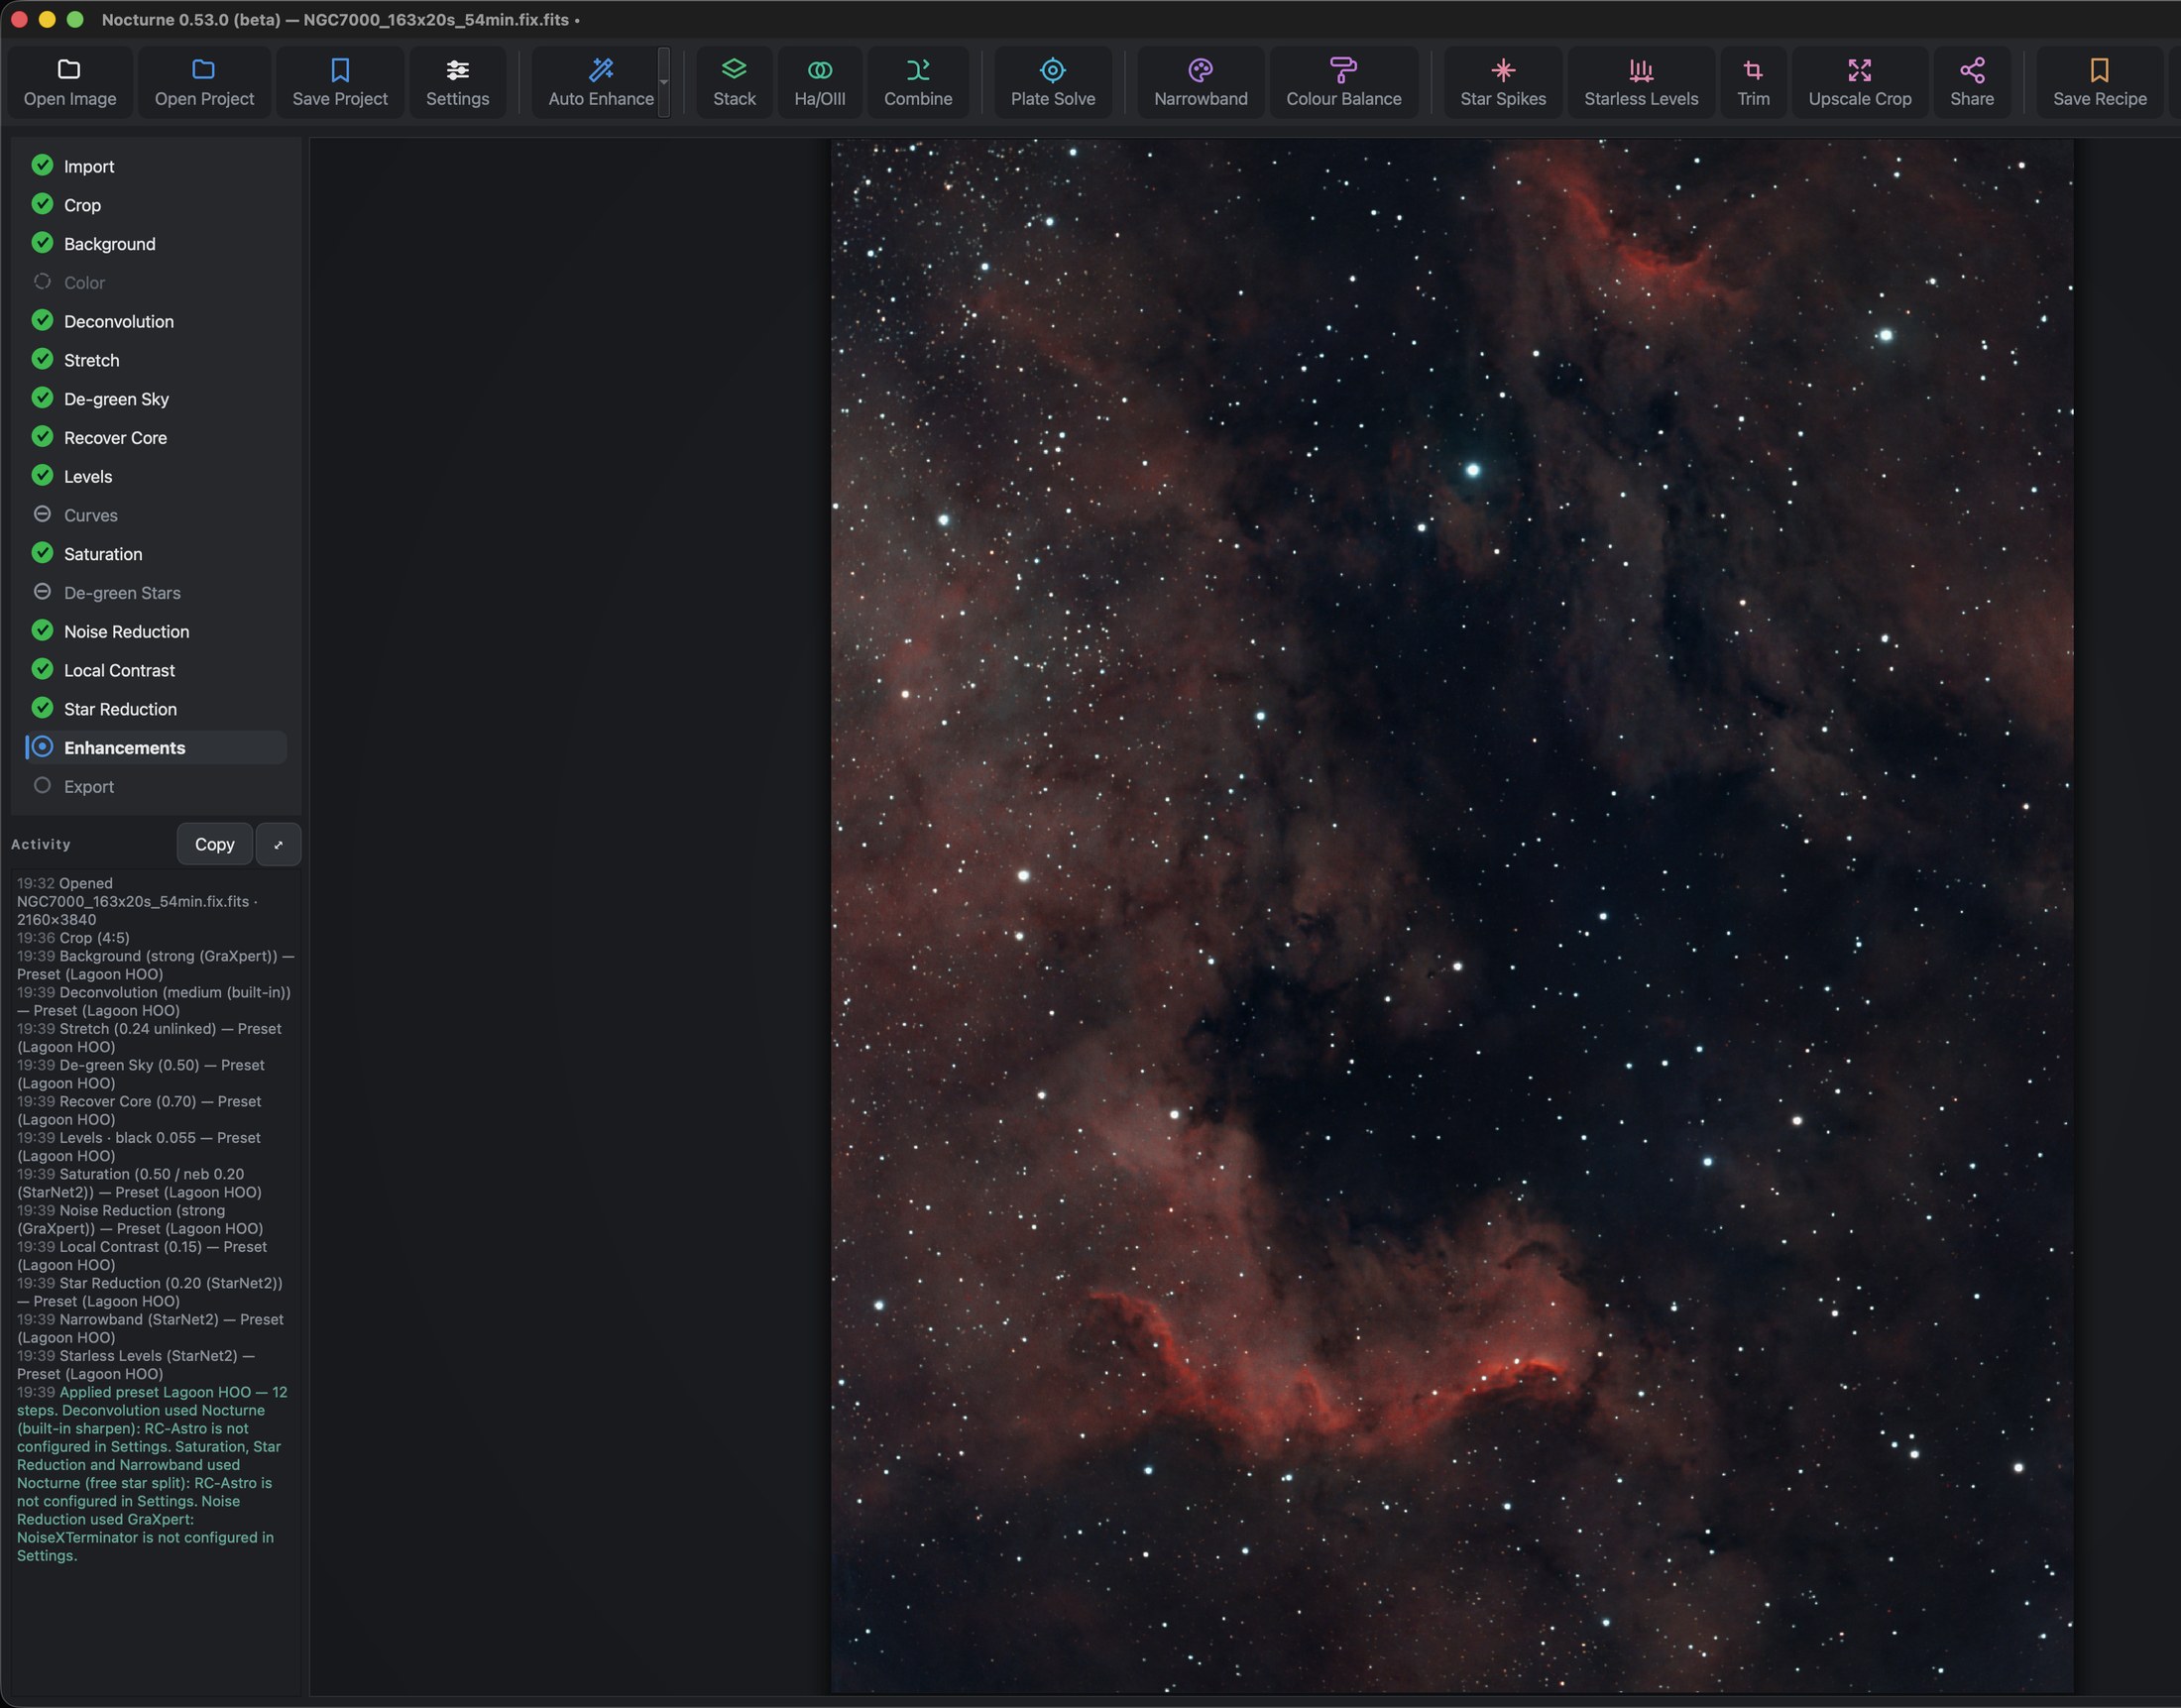
- Click the Apply button. Nocturne crops, then runs the preset’s steps one by one with a progress bar and Cancel. When it finishes you land on Enhancements.
If you had already processed the picture, Nocturne asks first: that processing is replaced, and your crop is kept. Leaving Crop with Apply and continue applies the crop only. A preset runs only from the button that names it.
Every step uses the values you saved, except Levels saved as Auto black point, which measures each picture again. If a step fails, Nocturne names it and runs the others. A step whose program is not set up in Settings is left out and named, and a step that falls back to Nocturne’s own version says so.
Managing your presets
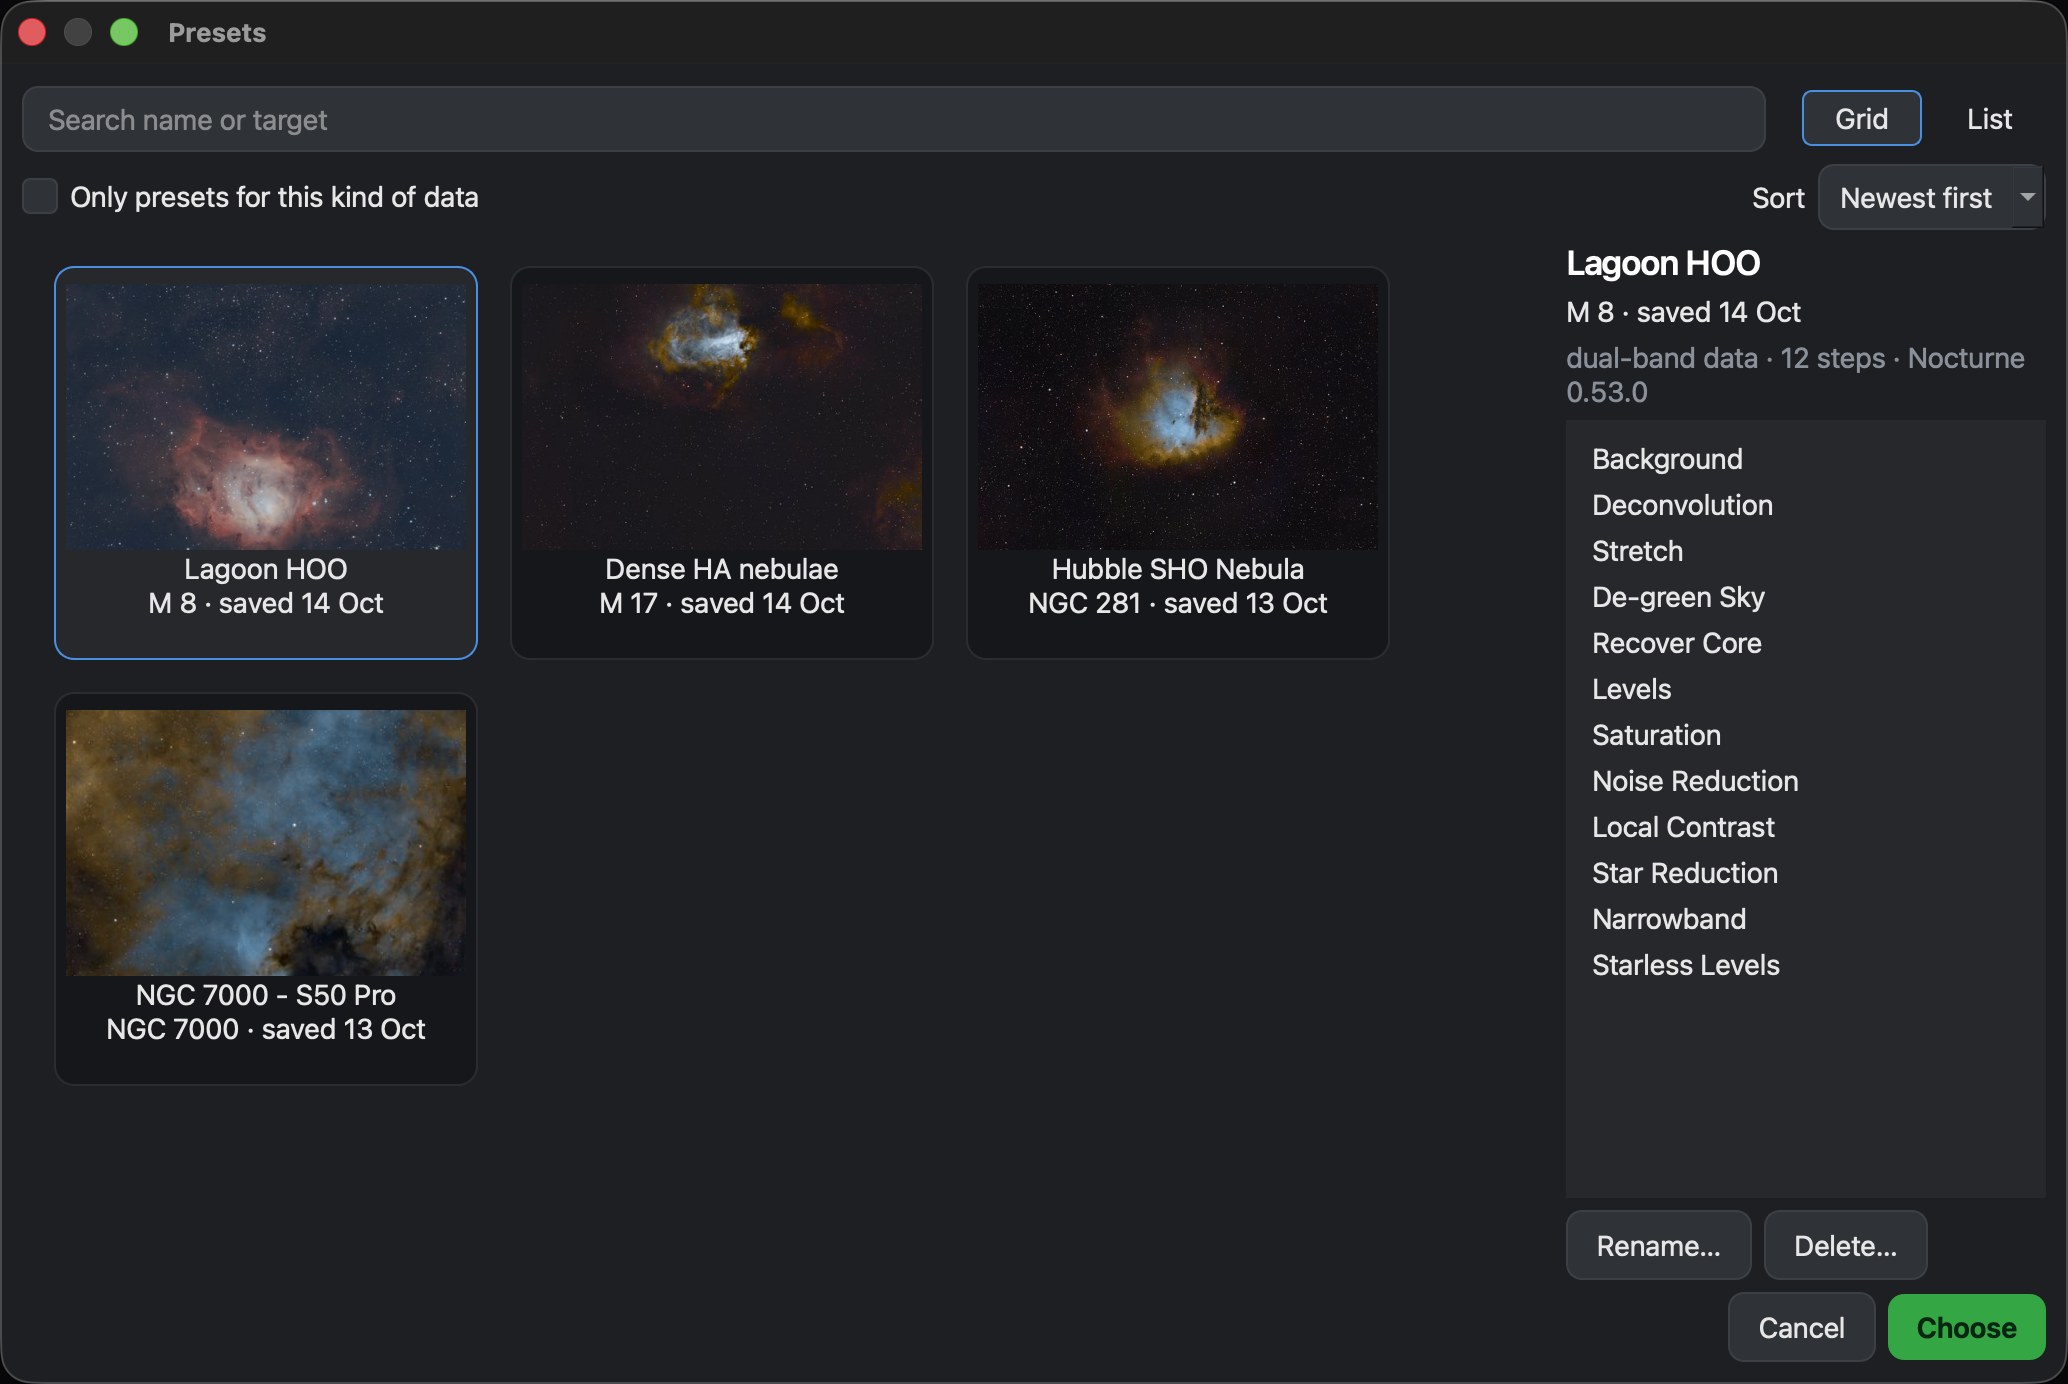
The Presets window shows them as a Grid with previews, or as a compact List for small screens, and remembers your choice. Sort by Newest first, Last used, Name or Target, and search by name or target. Tick Only presets for this kind of data to show only presets made on the same kind of data as the open picture, dual-band or broadband. Rename… and Delete… work in the same window. Deleting asks first and cannot be undone.
Limits
A preset remembers what kind of data it was made on, and the Presets window greys out the ones that cannot work on the open picture.
- Dual-band and broadband. A preset made on dual-band data (the Seestar’s LP filter) is greyed out on any picture that is not dual-band, including one Nocturne cannot tell either way. A broadband preset can be used on dual-band data, and is marked made on broadband data.
- Stretched or not. A preset saved from a picture that opened already stretched, such as a finished TIFF or an Upscale result, has no Stretch of its own. It cannot turn a normal FITS into a finished picture, so it is greyed out there. The reverse also holds: a preset made on an unstretched picture includes a Stretch, so it is greyed out on a picture that opens already stretched.
- One kind of target per preset. A preset made on a galaxy will not suit a faint nebula. Keep one for each kind of object you shoot.
Tips
Treat the result as a first draft. Step back through the history and adjust whatever this picture needs; that is quicker than starting from nothing, and nothing is locked.
Presets and recipes do different jobs. A recipe runs a whole folder in Batch without showing you anything. A preset works on the picture you have open, where you see every step. That is why Star Spikes and Starless Levels go in a preset but not in a recipe: their values are set by eye.
Download Nocturnefree · macOS, Linux & Windows Try it on sample data
New to Nocturne? Start here walks through a first picture, step by step.