Tools / Starless Levels
Toolbar tool
Starless Levels
Set the black and white points to where your data begins and ends, with the stars set safely aside, so the adjustment that brings out colour can’t wash out the stars.
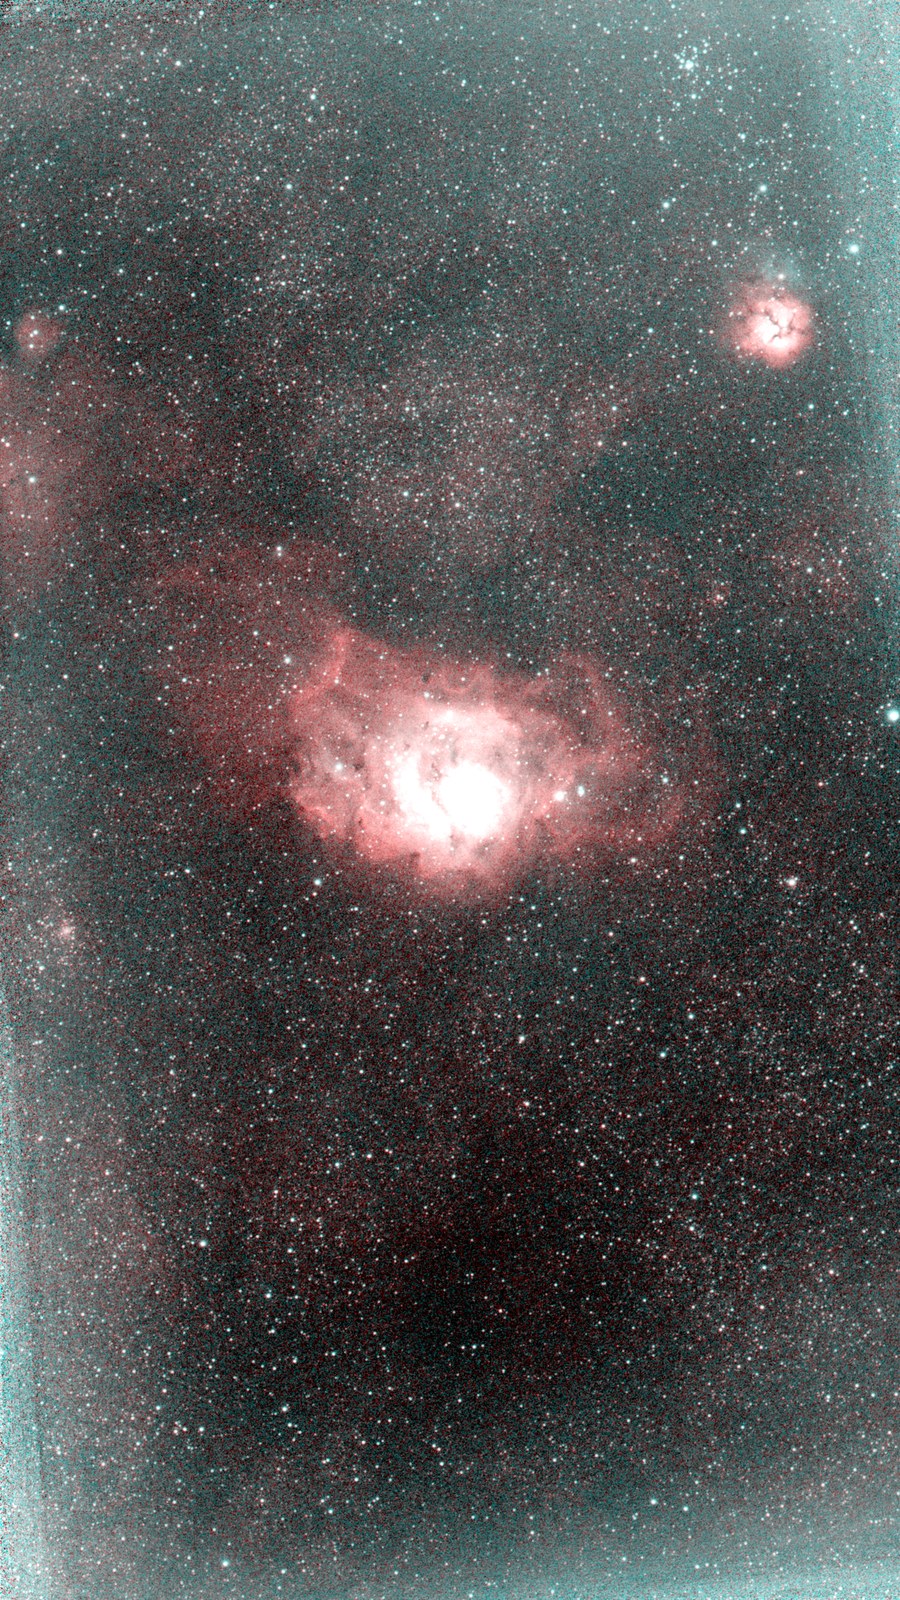
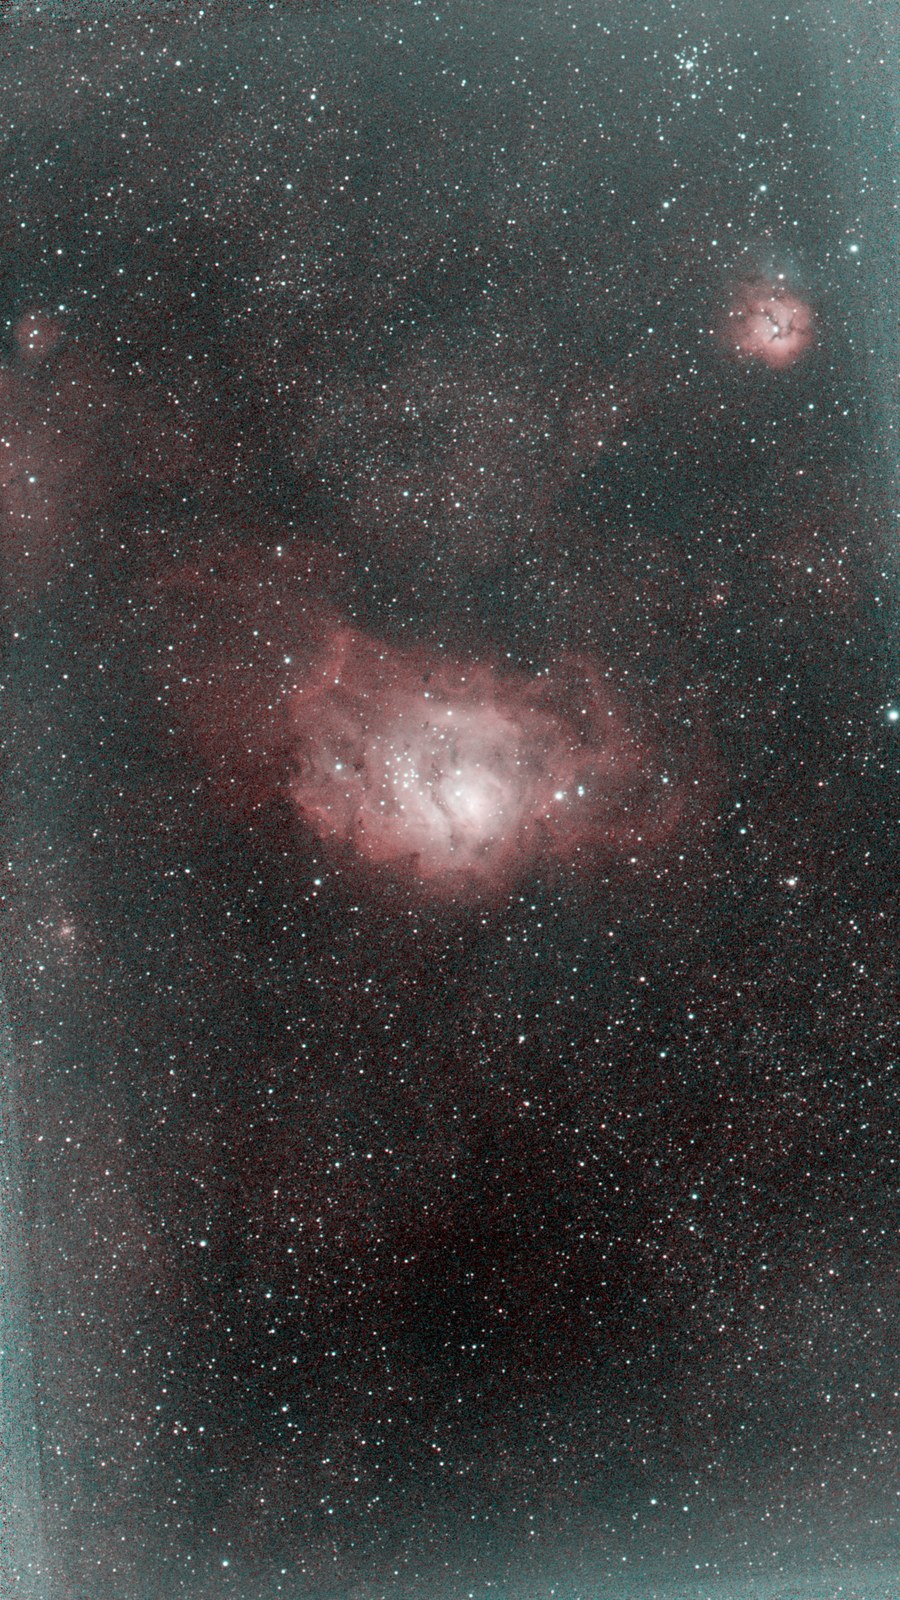 BeforeAfter
Drag to compare. Watch the stars as you drag: their colour doesn’t change.
Why this needs its own tool
Pulling in the white point is how you bring out colour in a stretched astrophotograph. It is also how coloured star cores turn pure white, which is why Nocturne’s normal Levels step won’t do it.
Starless Levels takes the stars out first, adjusts what is left, and puts the stars back untouched. With no stars in the picture, there are no star cores to lose.
The risk is real. On every master we tested, a typical white-point setting turned around six thousand star cores pure white. Seestar star cores are not overexposed in the original, so their colour is real, and once it is white it is gone.
Set it on the histogram
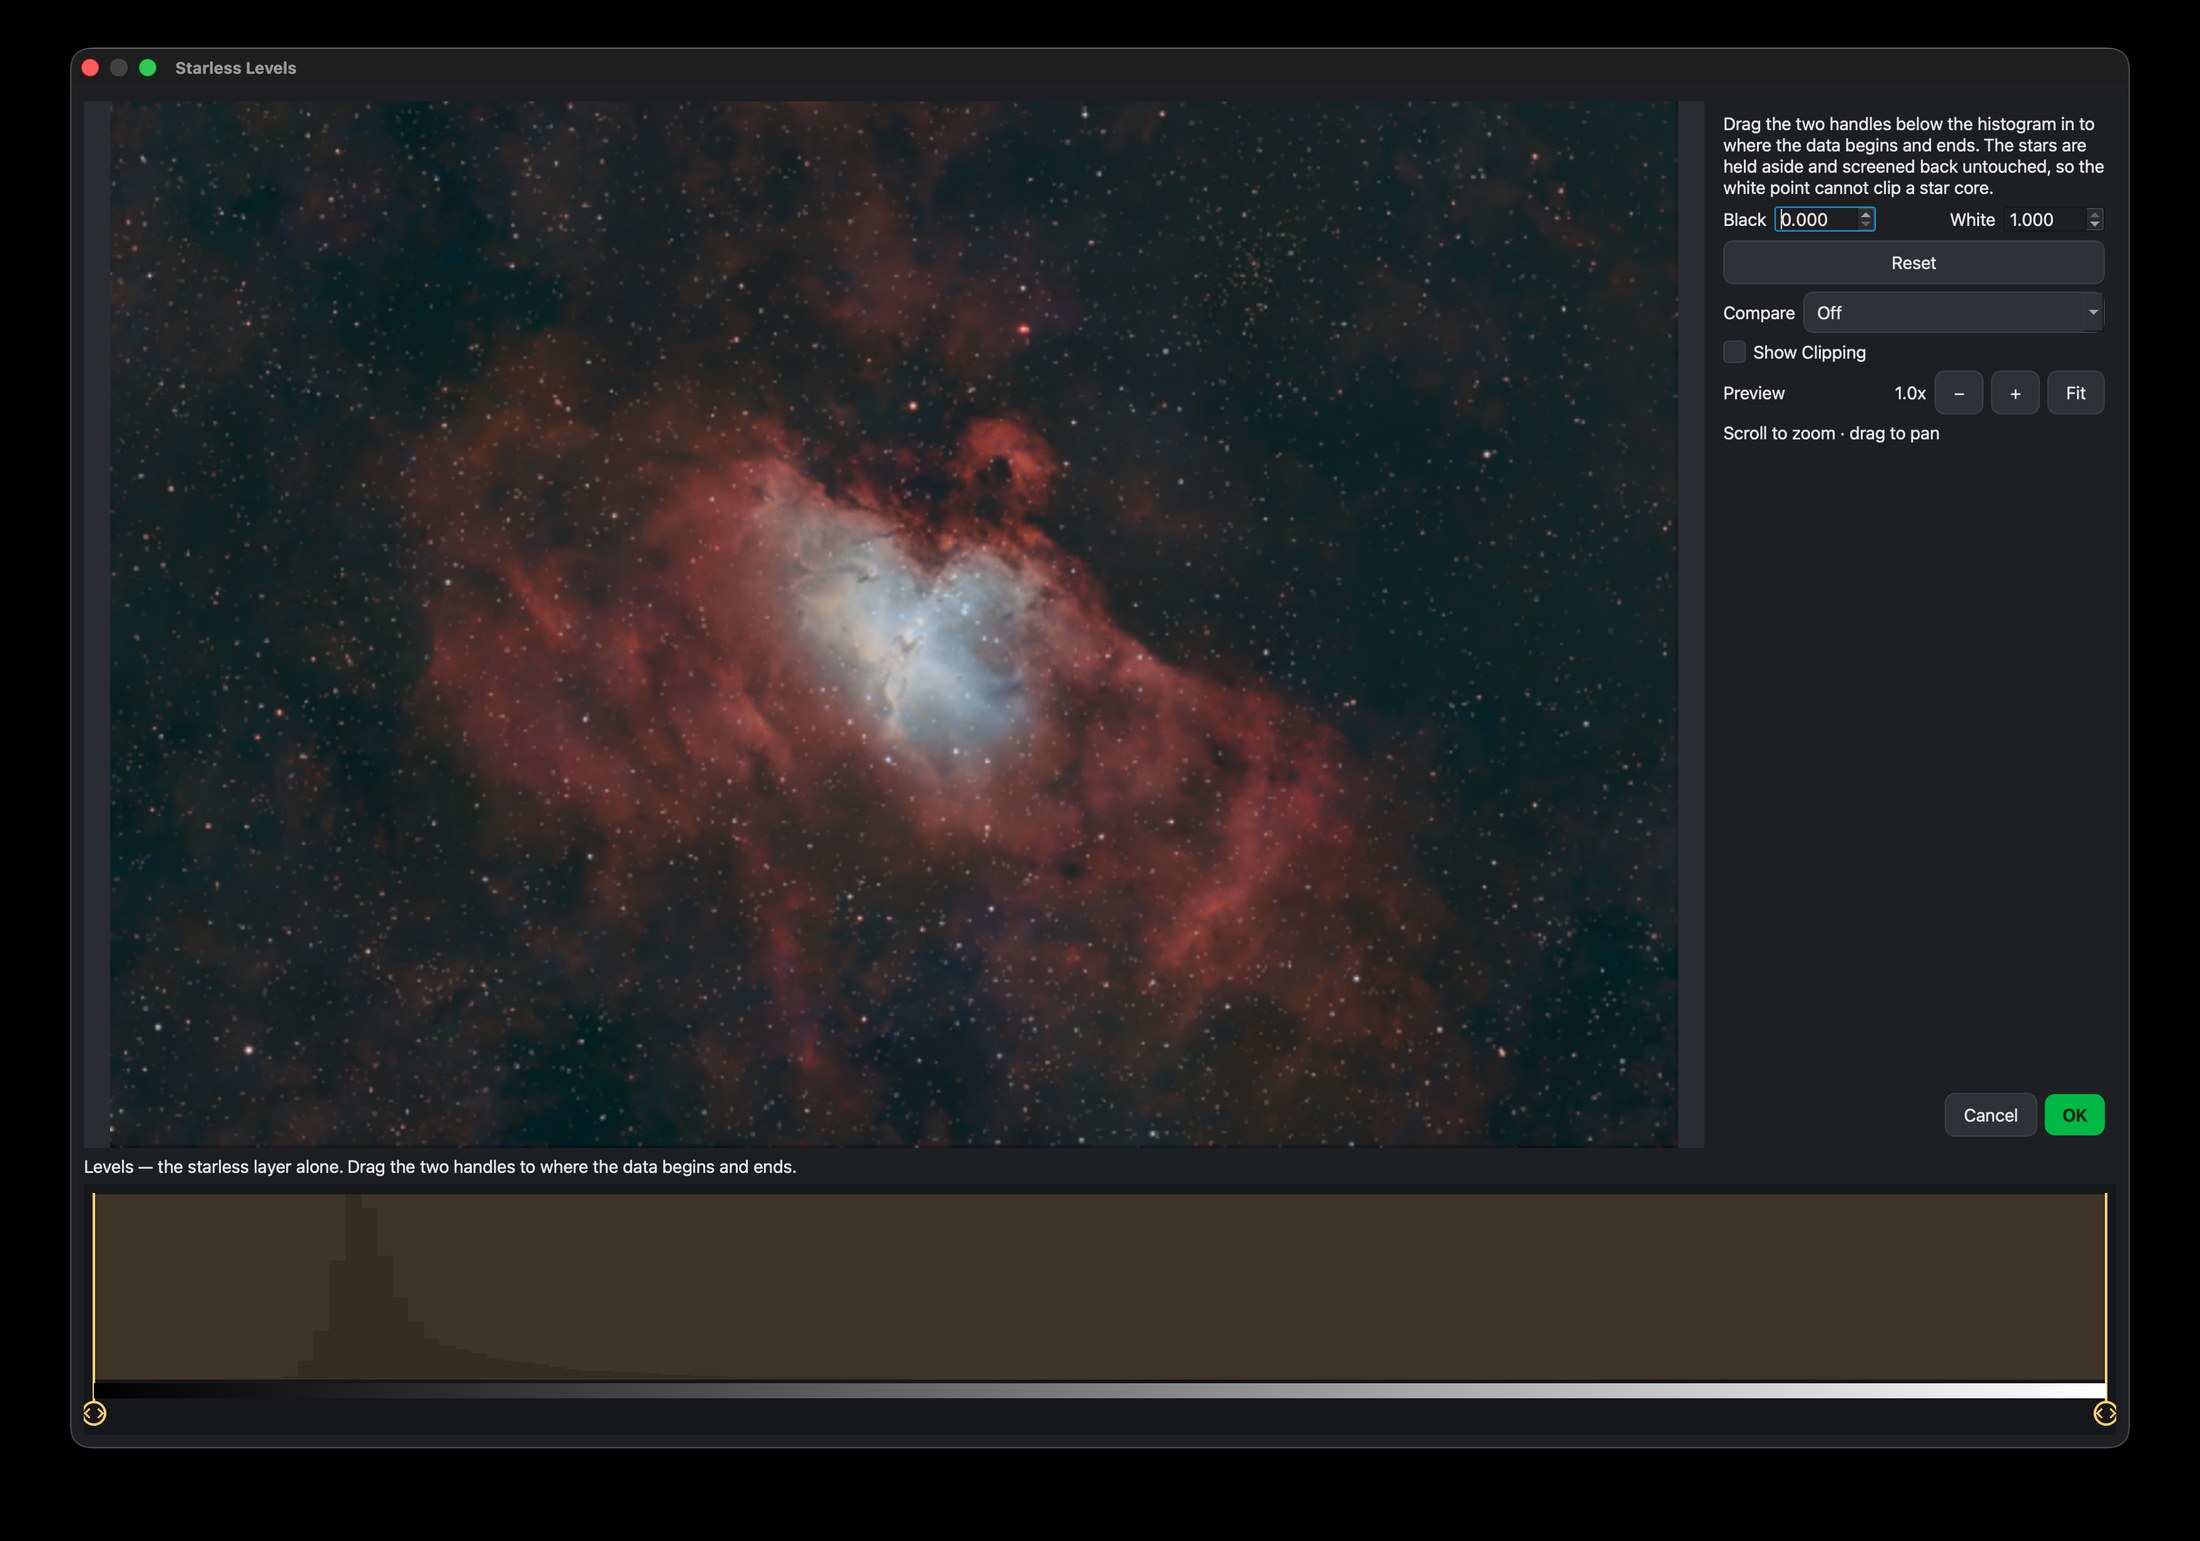
You set the two points by dragging handles on a large histogram of the picture without its stars, to where the data begins and ends. You can type the numbers instead if you prefer.
The histogram leaves out the stars on purpose: they would add a bright tail on the right that has nothing to do with this adjustment.
See what you’re about to lose
Turn on Show Clipping and the picture is replaced by a plain background on which only the pixels being clipped show, coloured by the channel that is lost. Drag until the first specks appear, then back off a little. It works like Alt-dragging the Levels sliders in Photoshop, but as a visible switch.
The background is white while you work on the black point and black while you work on the white point, so a single clipped pixel stands out.
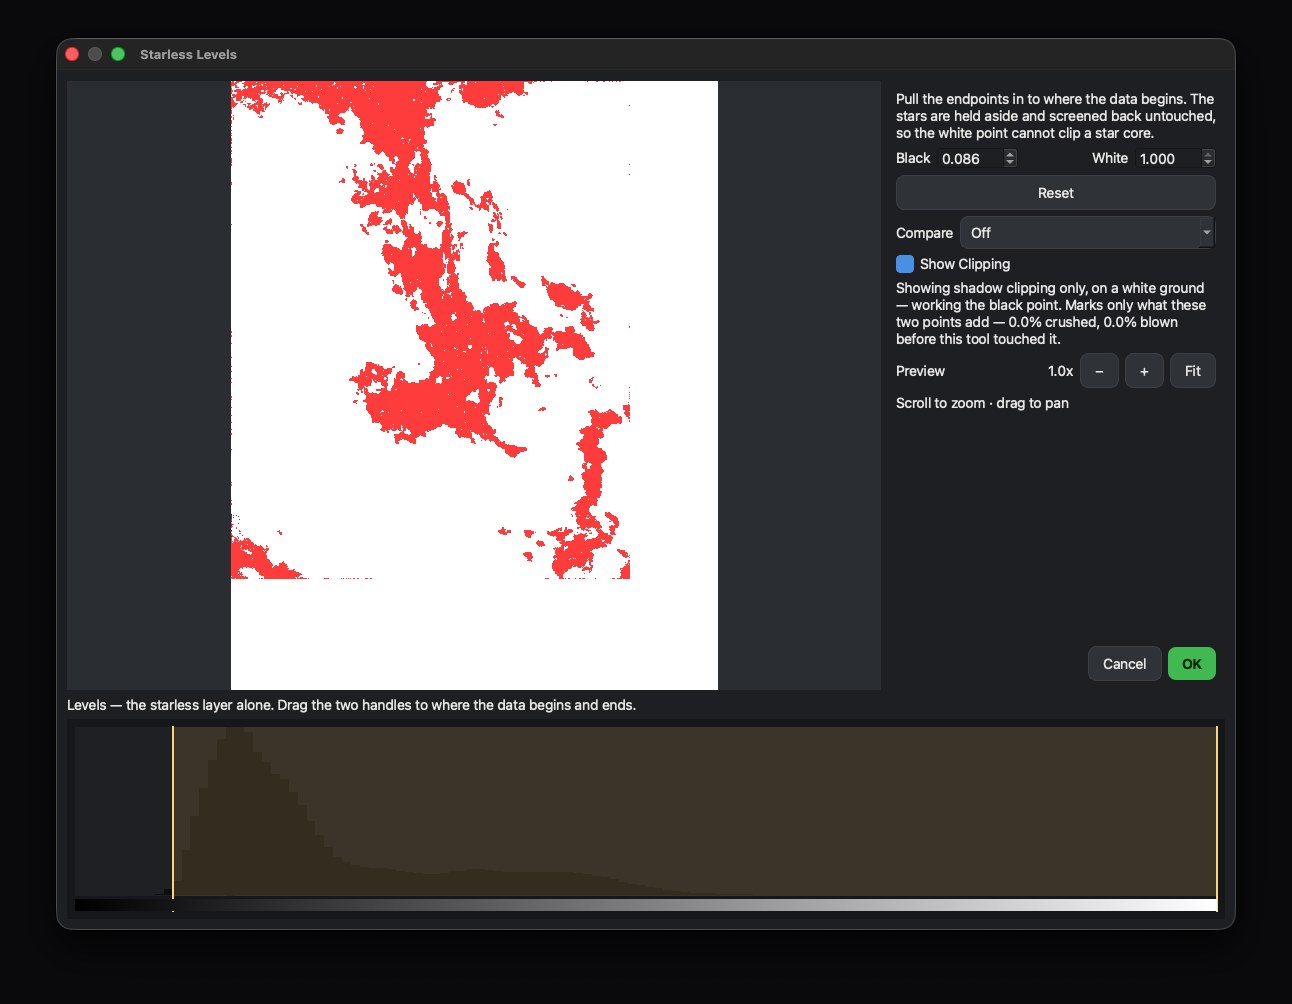
Two details make the view trustworthy:
- It shows only what you add. Most stretched masters already have a little clipping in their darkest parts. The view marks only the clipping your two points add, and mentions what was already there in a line underneath.
- A single clipped pixel still shows. A normal scaled-down preview would blur it away, so the clipping view keeps the brightest pixel of each block instead.
Compare while you work
The Compare control offers three views: off, a wipe with a divider you drag, or Before and After side by side. Both views zoom and pan together, so you always compare the same part of the picture.
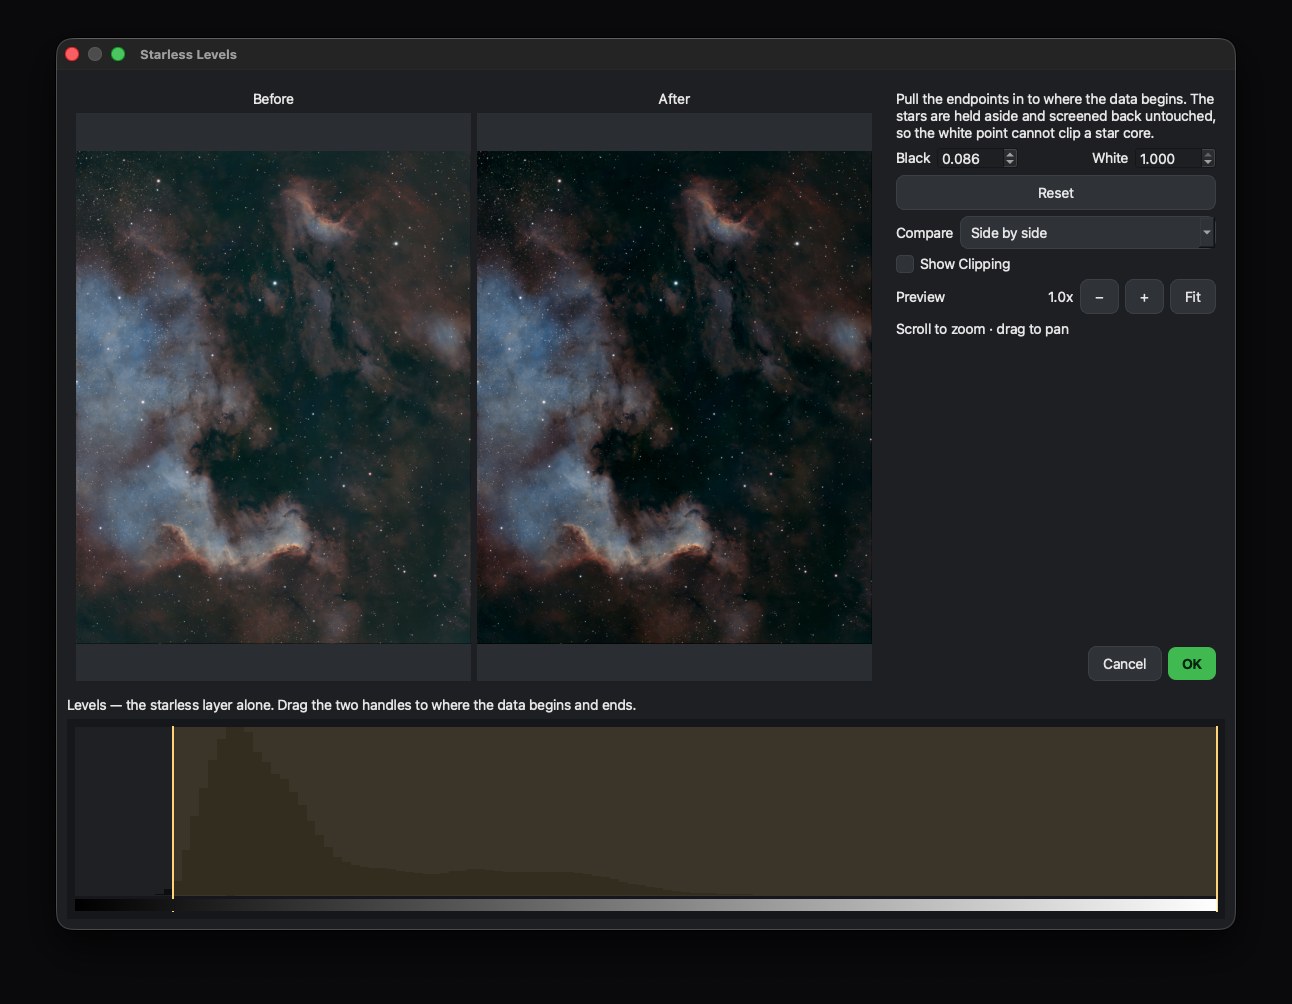
The wipe is best for small changes in brightness, since you see both versions in the same place. Side by side is better for checking whether faint detail survived.
What it doesn’t do
It doesn’t change your stars or your original file. It adds one step you can undo, and records its two values in the processing log and the provenance report.
It isn’t saved in recipes, on purpose. The right points differ from picture to picture, so values that suit one image would be wrong for the next.
Where it sits
Use it late: after the stretch and after the colour work, as a finishing step like Star Spikes and Upscale Crop. It takes a moment to open while it separates the stars.
Download Nocturnefree · macOS, Linux & Windows Try it on sample data
New to Nocturne? The guide walks through every step in order.